Riverside Countertop Guide is a local resource covering custom countertops in Riverside, CA. The guides below explain materials, typical costs, local considerations, and how the work is usually done.
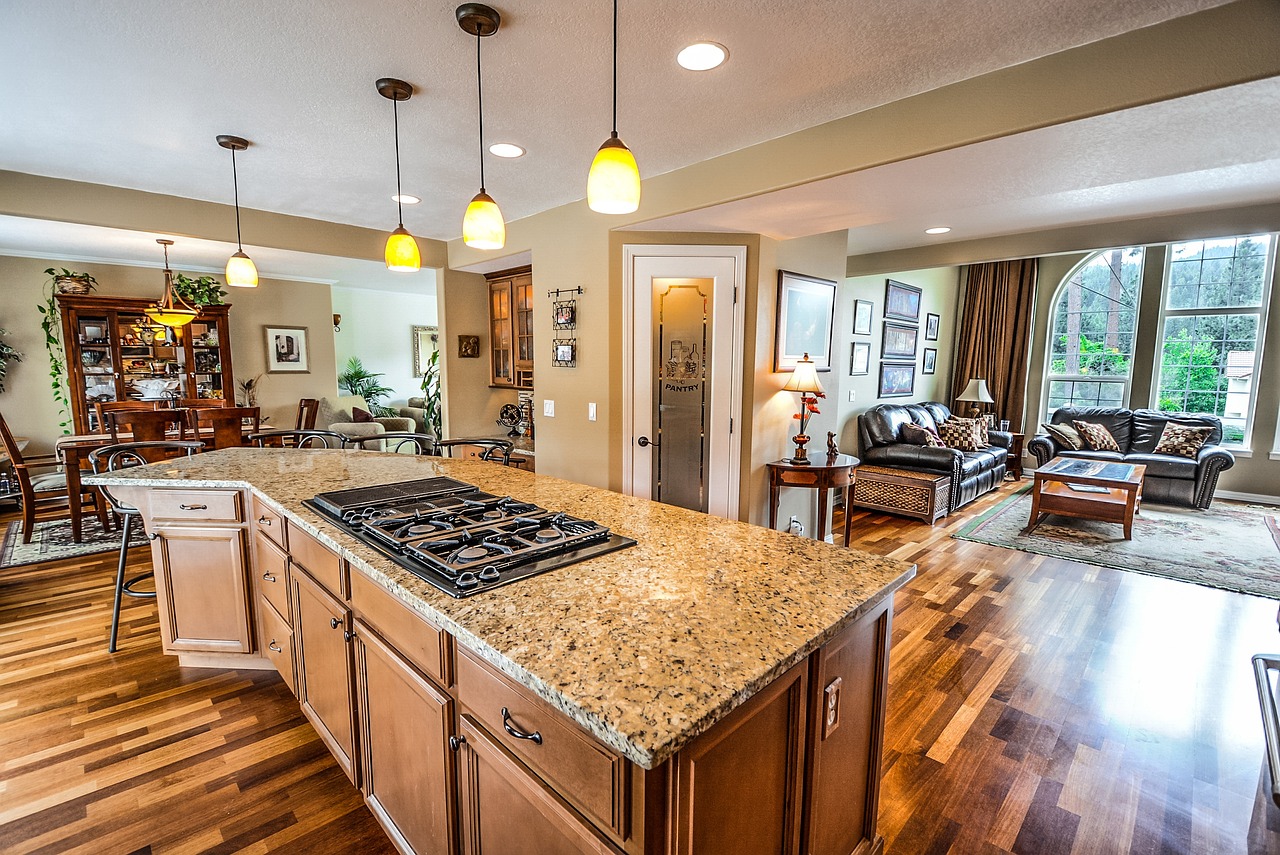
Most kitchen islands in Riverside are built at one of two heights, and the stool has to be chosen to fit whichever one the room has. A standard work surface sits at roughly the height of a person's hip, and a raised bar sits about a hand's width above the elbow of someone standing. Seats that suit one will feel wrong at the other, so the order of decisions matters: settle the counter height first, then shop for stools.
Two heights, two kinds of stool
The lower of the two heights is the same as the rest of the kitchen counters. Stools made for it are usually called counter stools, and their seats sit a little over a foot and a half off the floor. The higher height is the classic bar, and the stools made for it are noticeably taller, with a seat closer to two and a half feet. A person on a bar stool at a bar counter is looking slightly down at someone standing at the opposite side, which is why that height feels social and slightly formal.
The gap between the top of the seat and the underside of the counter is the number that decides comfort. Most people are happy when the seat leaves enough room for a thigh to slide under the edge without pinching, and still lets the forearm rest naturally on the surface. Too small a gap and knees knock the stone. Too large a gap and the person perches and leans, with the elbows hovering instead of resting.
Children complicate the arithmetic. A small child on a tall stool has feet dangling, no support under the legs and a long way to fall. Many families in Riverside end up with a pair of adjustable stools, ones with a lever that lifts or lowers the seat, so the same piece of furniture serves a grandparent, a teenager and a grade schooler. Adjustable seats also forgive a measuring mistake, which is worth something when the stone has already been cut.
What Riverside kitchens tend to have
In the tract homes of Orangecrest and La Sierra, an island often comes from the builder at standard counter height with a single raised ledge on the back side. That two-level form is common because it hides the cook's mess from guests, and it creates a place to rest a plate. If a remodel replaces the top, the existing framing usually decides whether the lower surface or the raised ledge becomes the seating zone. A homeowner who wants to sit at the lower level is working with the cabinet depth as it stands, and the stone may need only a modest extension to give knees room.
Older kitchens in the Wood Streets and the Mission Inn district were not designed around an island at all. A bungalow that gains one during a remodel gets a freestanding piece of furniture-like cabinetry, and its height can be set freely. Many owners there choose the standard counter height so the island blends with the existing runs, then pick stools with low backs that tuck out of sight when nobody is sitting.
In the hillside homes of Arlington Heights and Canyon Crest, the kitchen frequently opens to a view, and the raised bar has an appeal of its own. A guest on a taller stool looks over the cook's shoulder and out the window. If a raised bar is chosen, the stone ledge needs its own depth and its own support, which is a separate structural conversation from the stool itself.
Measuring before buying
A stool should be judged against the finished surface, not the cabinet. The cabinet carcass, the thickness of the stone and any underlayment all add height, and the total is what the person's thighs meet. Measure from the floor to the top of the stone, then to the underside of the edge. If the flooring is changing as part of the remodel, measure again after the new floor is in, because a thick plank or tile can raise the whole reference point by the thickness of a finger or more.
It helps to bring the real stool to the site. Sit on it, lean forward, rest the arms and slide in and out a few times. Photographs and spec sheets hide the details that matter, like how much the seat dips toward the front or how wide the base spreads. A wide base on a small island will collide with the neighbor's stool even when the seats themselves are comfortably spaced.
One more measurement is easy to forget: the underside of the edge is not always flat. Some stone edges carry a decorative bevel or a thick laminated build-up, and the lowest point of that profile is what the thigh meets. Measure to the lowest point, not to the flat part of the underside.
Spacing along the edge
Seats need room side to side as well as front to back. A comfortable allotment per person is wider than most plans suggest, because shoulders and elbows take more room than hips do. When the island is only a little longer than the stools need, the end seats get cramped against a cabinet or a wall corner, and the two middle seats feel generous. Many homeowners find they get more use from three roomy places than from four tight ones.
Stools with arms need more width again, and they usually cannot slide fully under the counter. A kitchen that gets daily use by children does better with armless stools that tuck in, since the island edge then stays clear for walking. Heavy stools are another concern in a house with a tile or hard floor: lifting is easier on a child than dragging, and scraping can mark a finish over the years. Felt pads or glides on the legs are cheap and make a real difference to both noise and flooring.
Heat and materials in the Inland Empire
Riverside summers push past the hundred-degree mark, and kitchens with big south or west windows can run warm even with the air on. Bare metal stools that sit near glass can get hot to the touch in the afternoon. Wood, upholstered and woven seats stay more forgiving. Upholstery should be a performance fabric that wipes clean, since island seating takes spills from a cook's hands, a child's snack and a pet's nose.
The finish of the stool legs also matters near hard water. Spots from the mineral-heavy water of the Santa Ana River basin show readily on dark painted metal and on glossy legs. A matte finish hides the film that forms when a floor is mopped, so the legs look cleaner between washes.
Leaning and the edge of the stone
People rest their forearms on the nearest edge of the counter, so the profile of that edge touches the body more than any other part of the island. A sharp square edge digs into the forearm after a long time. A softly eased edge is kinder to sit at. This choice sits alongside the stool decision, because someone who plans to do homework or work from a laptop at the island will notice the edge within the first week.
The same is true of the surface itself. A slick surface lets plates and laptops slide when a stool is bumped. A surface with a little texture holds things in place. These are small differences, but the island is where a household spends many of its waking hours, so they add up.
A short checklist
Confirm the finished counter height, including stone and flooring, before choosing seats.
Choose the gap between seat and underside of the counter by sitting on a real sample.
Give each place enough width for shoulders, not just hips.
Pick leg finishes that tolerate hard water spotting and summer heat.
Check the edge profile against the way the forearm will rest.
Stool height is a small detail with a large effect on whether an island becomes the favorite spot in a Riverside home or a decorative surface that nobody uses. Fitting the seat to the stone, rather than the other way round, is the step that makes the rest of the island design pay off.
A waterfall end is a slab of countertop that turns ninety degrees at the edge of an island and continues straight down to the floor, so the stone appears to pour over the side. In Riverside it is most often requested for open kitchens where the island is seen from the living room, because the side panel becomes a feature rather than a stretch of painted cabinet door. The look is dramatic, and it asks more of the design than a regular overhang does.
Why open homes suit the look
The kitchens of Arlington Heights and Canyon Crest often flow straight into a family room or a patio door, and the island's end is the first thing a visitor sees from the hall. A plain cabinet side with a drawer face or a panel reads as furniture. A waterfall panel reads as architecture. Owners who pick it are usually trying to give a long open room one solid, calm mass in the middle.
In Orangecrest and La Sierra tract plans, the island is frequently set parallel to a wide window or sliding door. The waterfall end there faces the dining area, and its stone patterning carries the eye from the work surface to the floor. A single slab with a bold vein can echo a fireplace surround or a feature wall in the next room, which helps the whole floor plan feel designed on purpose.
How it is actually made
The panel and the top are cut separately, then joined at a mitered corner, meaning each piece is cut at a forty-five degree angle so the two meet in a clean line. A butt joint, where one piece simply stops against the face of the other, is cheaper but shows a visible edge of the stone. The mitered version lets the pattern appear to wrap, but only if the cuts are precise and the pieces came from the same area of the slab.
Because the panel is vertical, it bears no load from people leaning on it, but it does carry its own weight, and stone is heavy. The fabricator will usually notch the cabinet or set the panel on the floor with shims and a bed of adhesive. The vertical piece may also be glued to a plywood backer. Flooring has to be settled before the panel arrives, since the bottom edge meets it directly and any later change in floor thickness shows as a gap or a scribed line.
Planning the cabinet beneath
A waterfall end replaces the finished end panel of the cabinet, which means the cabinet box has to be built to suit. The side is left unfinished or is simply pushed back so the stone takes its place. Hidden hardware, like shelf pins and drawer slides near that end, must clear the thickness of the stone. Since a panel can add a considerable amount to the depth or length of the island, the layout drawn at the start has to include it, or aisles that looked generous on paper will tighten.
The island must also be reasonably level and straight before the stone is ordered. A floor in an older Wood Streets bungalow may slope enough to make a panel look crooked next to the baseboard. The installer can shim the island, but the shims live under the cabinet, not under the stone, so the panel still has to sit on a floor that is flat in the area it touches. Taking measurements from the actual floor, not a drawing, avoids a corner that looks like it floated.
The seating question
A waterfall end sits at the narrow side of the island, and seating generally lives on the long side, so the two features rarely conflict. When stools go at the very end, the vertical stone takes the place where knees would otherwise go, and the seats lose a place. Some designs run the waterfall on both ends, framing the cabinet like a bookend. Others use it on one end only, with a more conventional seating overhang on the side facing the living area.
Anyone who plans seating at a waterfall end should think about the corner. The mitered point is a sharp edge unless it is eased, and it sits right at hip height for someone walking past. A slightly softened corner is easy on the body and on the stone. In a house with young children, many owners round that edge a little more than the rest of the island.
Choosing stone for the look
Stone with strong movement shows the waterfall best, since the flowing line of the vein is the entire point. Plain, evenly colored stone gives a calmer effect, almost a monolith. In between lie stones with a soft cloud of pattern, which hide small imperfections at the joint. Whichever is chosen, the slab should be inspected in person before it is cut, since the same stone name can vary widely from one slab to the next.
Light and heat influence how the waterfall reads. Riverside homes receive strong direct light through the late afternoon, and a vertical surface facing a west window can glare. A honed finish, with less shine, usually looks softer on a panel than a high polish does. Because the surface is vertical, it also gets scuffed by shoes, vacuum cleaners and pet bowls, so a finish that tolerates marks is more practical than one that shows every touch.
Weight and handling on site
A full-height stone panel is one of the heavier pieces of a countertop job. It must move through the front door, down a hallway and into position, often with several people and special carrying frames. Tight entries in older Casa Blanca cottages and the Mission Inn district can limit the size of a piece, which sometimes forces a seam in the panel. A seam in a vertical panel is more visible than a seam on a horizontal surface, because the eye sees it straight on, so the placement should be discussed ahead of time.
Homes with a second-floor kitchen or a steep driveway add to the difficulty. A hillside property near Mount Rubidoux can have a long staircase from the street, and the fabricator needs to know in advance. Delivery limits are part of design, not an afterthought, and they can decide whether a waterfall end is a single piece or two.
Cost of mistakes and how to avoid them
Mistakes with a waterfall tend to be expensive because the stone is large and the cuts are irreversible. The most common are a miter that does not close, a pattern that jumps across the corner, a panel that touches the floor unevenly and an outlet or drawer that clashes with the stone. All of them are avoidable with a few steps before cutting.
Mark the veining on the slab and agree which area becomes the top and which becomes the panel.
Confirm the finished floor level and any slope at the end of the island.
Decide on outlets or switches at that end of the island before the stone is fabricated, since drilling a finished panel is risky.
Walk the delivery route with the installer and note every turn and doorway.
Living with the finished result
Once installed, a waterfall end is simple to care for. The vertical surface collects less spilled liquid than the top, but it picks up fingerprints and splashes from a mop. Hard water leaves spots on dark, glossy stone, so a wipe with a soft cloth after cleaning keeps it clear. The joint at the miter is the one place worth checking from time to time, to confirm the fill is intact.
For a Riverside kitchen that opens to the rest of the home, a waterfall end is one of the more rewarding upgrades to the island. It asks for clear planning, a patient fabricator and a floor that is ready, but the result gives a long-lived focal point that looks as if the room had been built around it.
An island in a Riverside kitchen needs power, because it is where blenders, mixers, laptops and phone chargers end up, and a cord stretched across an aisle is both unsafe and annoying. Adding a receptacle to an island is possible in almost every house, but the route the cable takes depends on how the home was built, and the location of the outlet has to respect both safety rules and the stone above.
Why the island is a special case
Most kitchen outlets sit in the wall above the counters. An island has no wall, so the power has to come from below or from the side of the cabinet. Electrical rules for kitchens recognize this and generally require that an island with a work surface of a certain size have at least one receptacle that people can reach. The exact wording differs by edition and local adoption, so the electrician and the building department decide the details. The principle is the same everywhere: an island without any outlet pushes people to use extension cords, which the rules are meant to prevent.
A second rule of thumb is that kitchen counter receptacles are protected by a ground-fault device, a special breaker or outlet that cuts power quickly when current leaks to ground. Anything near water, including a sink in the island itself, falls under this protection. Homeowners rarely need to know the technical language, but they should expect the electrician to mention it.
How cable reaches an island in tract homes
The Orangecrest and La Sierra tract homes built on concrete slabs present the main challenge. There is no crawl space underneath, so the cable must either be placed in a conduit that was cast into the slab during construction, or cut into the slab after the fact. Some builders ran a conduit to the island location on purpose, and a remodeler can find it by looking for a floor box or a capped pipe. Others did not, and then the path has to be created.
Cutting a slab means saw-cutting a narrow trench from the nearest wall to the island base, laying the conduit, and patching the concrete. It is noisy, dusty and not cheap in labor terms, but it is a well-understood job. The new floor finish then covers the patch. The work should be scheduled before the cabinets and flooring go in, since both sit over the area.
When the existing conduit is present, the electrician pulls cable through it and ends it inside the island cabinet in a junction box. From there it feeds the receptacles. Keeping the junction box reachable, behind a removable panel, saves future service calls.
Older homes and raised floors
The bungalows in the Wood Streets and the Mission Inn district, along with Casa Blanca cottages, often sit on raised wood foundations with a crawl space. That makes the work simpler: the cable runs under the floor from the nearest panel or outlet, comes up through a hole in the island's base, and ends in the cabinet. The crawl space is dry and accessible in many of these houses, though the electrician has to take care around old wiring and around pests.
Older wiring in these houses may not suit the new load. A kitchen remodel that adds an island, a dishwasher and a larger range often needs a service review. The electrician will check whether the panel has room for another circuit and whether the existing wiring is in good condition. These checks are normal and form part of a permitted remodel.
Where the outlet may sit
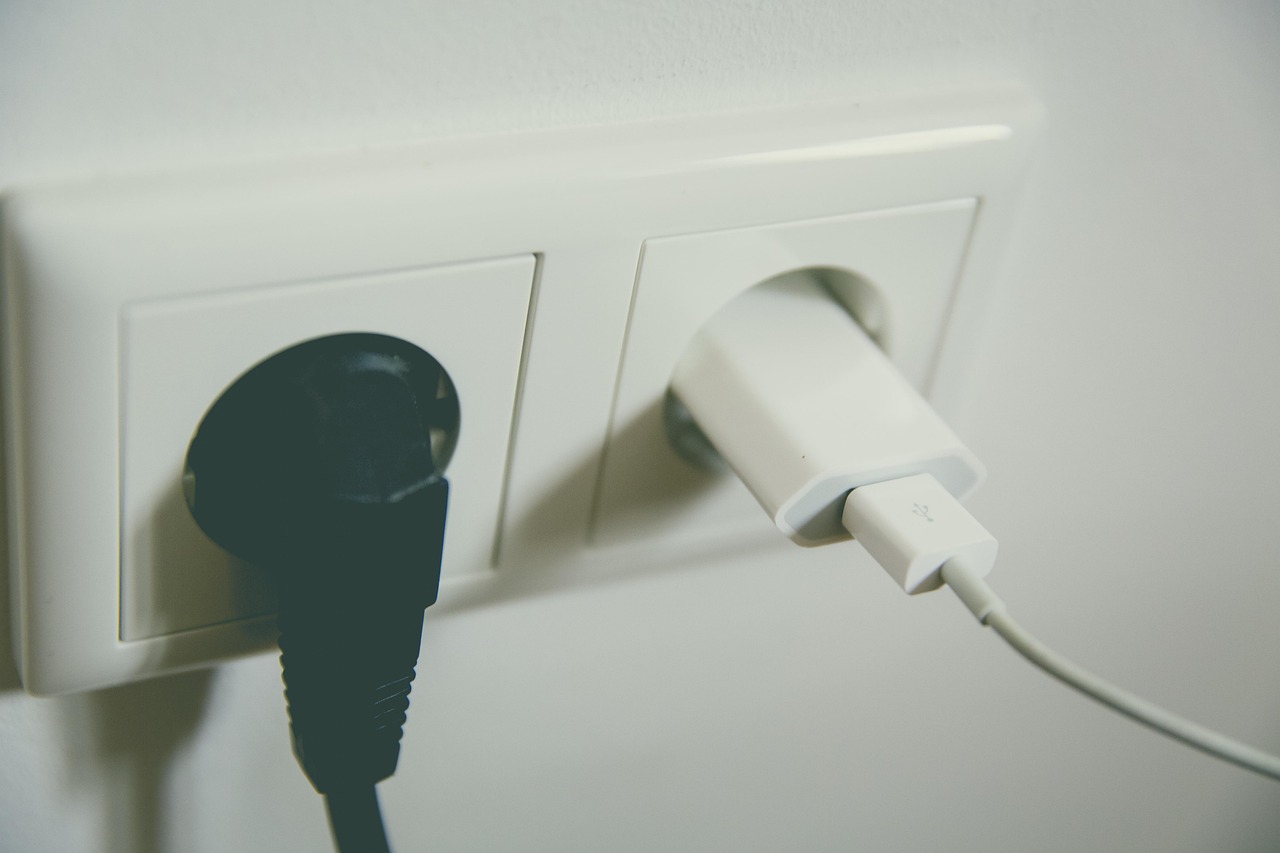
Receptacles on an island are usually placed on the side of the cabinet, below the countertop edge, or in a pop-up unit set into the stone. Codes generally limit how far below the counter edge a receptacle can be mounted, so one set at the very bottom of the cabinet may not count. Placement also depends on overhang: when an overhang is deep enough for seating, the side panel under it may be hidden by stools and knees, and the outlet would be awkward to reach.
Many designers place the outlet on the end of the island, away from the seating side. It stays out of sight from the living room and is easy to reach from the cook's side. If the island has a waterfall end, the outlet has to find another place, because drilling through a finished stone panel is rarely a good idea.
Stone and the cutout
When the outlet will be in the countertop itself, the stone fabricator cuts an opening to a template provided with the hardware. Rounded corners hold up better than sharp ones, since stone cracks from stress at inside corners. The opening should sit well away from seams and from the edge. The hardware's flange sits on top of the stone, so the thickness of the slab and any build-up underneath matter when ordering.
The hardware is ordered before the stone is cut, not after. A fabricator relies on the real unit or on exact manufacturer drawings, because a cutout made from guesswork is either too tight or too loose. If the house will take a different model later, the old opening may not fit.
Heat, dust and summer conditions
Riverside's summers put extra load on kitchens. Island outlets feeding blenders, slow cookers and window-unit fans see heavy use during a heat wave, and a receptacle that sits in direct sun may warm up. Quality hardware is rated for continuous kitchen duty. Dust from the Inland Empire settles in everything, so any pop-up unit that closes flush with the stone stays cleaner than an open one.
Hard water from the Santa Ana River basin also leaves mineral film on metal faces. A brushed or matte finish on the receptacle cover hides it. Wiping around the unit with a soft cloth is enough in most households.
Planning the number and spacing
An island that will serve as a work station deserves more than one outlet. Two receptacles, spaced apart, let two appliances run without a cord crossing the work surface. A household that expects to charge several devices at once may add dedicated charging points. The key is to decide early, since every added receptacle means another opening in the stone or another box in the cabinet.
Ask the electrician how the cable will reach the island before the cabinets are ordered.
Confirm whether the slab holds a conduit or needs a new one.
Choose receptacle hardware first and send its template to the stone fabricator.
Keep an access panel for the junction box.
Check the local requirements on height and number of receptacles with the permit office.
What a finished island looks like
When the work is done well, nobody notices the outlet. A cook plugs in a mixer, a student plugs in a laptop, and the cord drops straight into the cabinet instead of draping across the floor. In a Riverside house where the island sits at the center of daily life, that quiet convenience is worth the planning it takes to get power there in a way that is safe, tidy and legal.